Monday, November 28, 2011

Final Photos


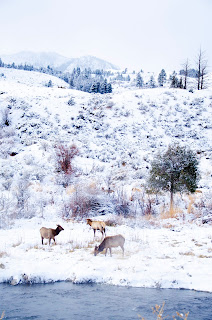
Nikon D7000
Nikkor 18-105mm 3.5-5.6 Lens
Focal Length: 105mm
Av: f/5.6
Tv: 1/100
ISO 100
No flash


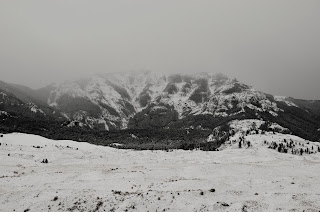
Nikon D7000
Sigma 30mm 1.4 Lens
Focal Length: 30mm
Av: f/2
Tv: 15 seconds
ISO 1600
No Flash


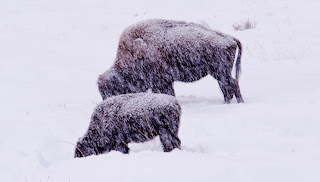
Nikon D7000
Nikkor 18-105mm 3.5-5.6
Focal Length: 48mm
ISO 200
Av: f/11
Tv: 1/125
No Flash


Nikon D7000
Nikor 18-105mm 3.5-5.6
Focal Length: 105mm
ISO 100
Av: f/6.3
Tv: 1/400
No Flash


Nikon D7000
Nikkor 18-105mm 3.5-5.6
Focal Length: 105mm
ISO 100
Av: f/6.3
Tv: 1/500
No Flash


Nikon D7000
Nikkor 18-105mm 3.5-5.6
Focal Length: 105mm
Av: f/11
Tv: 1/80
ISO 200
No Flash


Nikon D7000
Nikkor 18-105mm 3.5-5.6
Focal Length: 70mm
ISO 200
Av: f/11
Tv: 1/100
No Flash


Nikon D7000
Nikkor 18-105mm 3.5-5.6
Focal Length: 105mm
ISO 200
Av: f/11
Tv: 1/80
No Flash


Nikon D7000
Nikkor 18-105mm 3.5-5.6
Focal Length: 105mm
ISO 400
Av: f/5.6
Tv: 1/800
No Flash


Nikon D7000
Nikkor 18-105mm 3.5-5.6
Focal Length: 105mm
Av: f/5.6
ISO 200
Tv: 1/200
No Flash


Nikon D7000
Nikkor 18-105mm 3.5-5.6
Focal Length: 105mm
ISO 200
Av: f/5.6
Tv: 1/640
No Flash


Nikon D7000
Nikkor 18-105mm 3.5-5.6
Focal Length: 92mm
ISO 200
Av: f/5.6
Tv: 1/500
No Flash


Nikon D7000
Nikkor 18-105mm 3.5-5.6
Focal Length : 90mm
ISO 400
Av: f/11
Tv: 1/200
No flash


Nikon D7000
Nikkor 18-105mm 3.5-5.6
Focal Length: 50mm
ISO 100
Av: f/11
Tv: 1/160
No flash


Nikon D7000
Nikkor 18-105mm 3.5-5.6
Focal Length: 42mm
ISO 100
Av: f/4.8
Tv: 1/640
No Flash


Nikon D7000
Nikkor 18-105mm 3.5-5.6
Focal Length: 105mm
ISO 100
Av: f/5.6
Tv: 1/500
No Flash


Nikon D7000
Nikkor 18-105mm 3.5-5.6
Focal Length: 105mm
ISO 100
Av: f/5.6
Tv: 1/640
No Flash


Nikon D7000
Nikkor 18-105mm 3.5-5.6
Focal Length: 80mm
ISO 100
Av: f/11
Tv: 1/125
No Flash


Nikon D7000
Nikkor 18-105mm 3.5-5.6
Focal Length: 80mm
ISO 200
Av: f/11
Tv: 1/125
No Flash


Nikon D7000
Nikkor 18-105mm 3.5-5.6
Focal Length: 105mm
ISO 100
Av: f/5.6
Tv: 1/320
No Flash


Thursday, November 17, 2011

Thursday Blog


I picked this photo because mountain ranges aresomething that I like photographed. This photo really applealed to me because of how the sunset is just hitting the mountains and bring out those colors with it. I like the fad of dark to light in the sunset going from left to right. This also appealed to me becasue I'm a big fan of snow and I'm a sucker with a lot of photos with snow. The lake right in the middle of it just really adds to it to being that it is the main subject.

Art Show Photo

Tuesday, November 8, 2011

November 8th, 2011

The color of the leaves were what I wanted to capture. The oranges add some interest.

I waned a different perspective of the trees. Being down low adds to the size of them and makes them look quite tall.

Rocks are something not manmade, but I was hoping to capture the lines within this rock hoping that it would add to the photo.

Animal footprints would be something a little different and unique. I'd hope the angle of the shot would add some interest to it.

The main attention is the snow, but the leaves being scattered about add something to it. There's the pattern of the white snow, but it is broken by the scattering leaves.

Thursday, November 3, 2011

November 3rd Post


I chose to talk about an image. I chose lightning photography becuase in my other class, we are supposed to do a project involving things like this. But, its too late in the year to be able to caputre anything like this, so I thought I would just talk about it. Lightning photography is something that could be very cool if done right. I think that capturing it with a beautiful landscape really adds to it. Capturing it is hard because you can either to long exposure or multiple shots over some time and hope something comes out.


Thursday, October 27, 2011

Picture discussion


This was an interesting photo that I stumbled across that I found interesting. I like the photo because it has so many different factors in it that seem to make it interesting. The first is that the photo was taken with what I think is a fish eye lense. So it gives it that distorted effect to it. Then you can see the northern lights very strongly in the sky. Giving it an unreal effect to it. It was also a long exposure shot. I'm gonna guess between an hour and 2. When you look up past the northern lights, you can see some star trails. Then the last thing to it is the reflection of the water and how everything you see above is also below it.

Thursday, October 20, 2011

October 20th blog

Types of photos that really interest me are extreme action or sports photos. Its something that I think would be pretty cool to do as a career in photography. I think its something about all the adrenaline rush in doing it and how every shot you get will almost look different. Theres so many sports out there that you can choose from that it makes it seem like it would never get boring. You're always ready and waiting for the next action shot that you can get.


Monday, September 26, 2011

9/22/11 Photos


Camera: Nikon D7000
Lens: Nikor 18-105mm F:3.5-5.6
Aperture: 5.6
Shutter Speed: 1/50
ISO: 100


Camera: Nikon D7000
Lens: Nikor 18-105mm F: 3.5-5.6
Aperture: 14
Shutter Speed: 1/50
ISO: 100


Camera: Nikon D7000
Lens: Nikor 18-105mm F: 3.5-5.6
Aperture: 22
Shutter Speed: 1/30
ISO: 100

Wednesday, September 21, 2011

September 22nd Article Blog

http://mansurovs.com/hdr-photography-tutorial

Something that has interested me, and that I would like to try is something called HDR photography. Which means High Dynamic Range. What it is, if I can explain it well enough, is a photo that is a collection of other photos, put together at different exposures. You take multiple pictures of a scene with the camera on a tripod. There may be a scene where you may not be able to capture the entirety of it because different exposure levels may block out something or another. So you take multiple pictures at different exposure settings, catching different shots of the environment. But you do it all without moving the camera. You put the shots together to give it a surreal scene that looks amazing. Now I don't entirely understand it all, and I may be flawed in how I explained it, but its how I perceived it while reading.


Wildlife Photography


In reading chapter 3, we were supposed to pick 3 different wildlife pictures and blog about concepts that were used for the chapter in getting these photos. But with the photo above, its hard to tell what was used. I'd say that this was during mating season for the animals as they were fighting and that the photographer knew when the season was. The photographer knew of the location that the animals could be found and so that person waited for them and captured them, but waited for them to be fighting. So he used patience, homework and was probably a reasonable distance from them. I find it hard with the lighting though. I love the picture, but what plays in my mind is that this picture was taken at night with what looks like headlights on them. But it could even be a sunrise or sunset.


This picture is an easy one to identify. The photographer did it from the comfort of their own home and used bait to capture the subject. But, it also took patience in waiting for the subject because the bird isn't gonna come right up. The photographer would also of had to had kept his distance so that the bird would actually come and not be frightened. Then, just fired away!


The photographer did their homework of knowing when the salmon would be swimming upstream and location for the bear and specific type. They knew the behaviors of the bear and the fish and probably camped and waited for the subject to show. In a way, its like baiting, but nature's own way of doing it.  So they indirectly controlled the subjects behavior. Then they had to wait for the right time when the bear would enter the water and go for the fish.

Rule of Thirds


The photo above demonstrates the rule of thirds. The 4 lines are evenly distributed among the frame, giving way to 9 equal sections. What I learned about while reading was distribution of the subject in the photo. When photographing your subject, depending on what they may be, it seems to draw more attention and interest into the photograph when the subject is to the left or right of the center along one of the lines. When something is centered, the viewer looks at it and becomes bored because they've seen everything. But when its to the side, the viewer looks to the center, see's nothing and scans the photo. It adds interest to the photo having the subject somewhere else. 

September 15th Article Blog

http://www.1stwebdesigner.com/design/eight-photography-effects/

This was an article that I stumbled on quite a while ago, but it does seem to have important aspects for a photographer. The article is basically about 8 different effects you can use. Some are strictly for art while others can make great photographs of whatever you're doing.

One effect is the golden hour, which most photographers should know. Its the last or first hour when the sun rises and sets and can make for great shots that interest and add a lot of color to the photograph. There is also Bokeh, which I think is more of an art style of photography. The point of it is is to blur lights to give it an effect. The lights could also be manipulated with objects and people to make it look like they give a purpose.

Other things were the rule of 3rds and the golden mean which is something that we have already learned and is about proportioning the subjects for photographs.

There are 4 other effects that if you want to, you can read in the article. But I thought that this would of been a great article to share with the class because a lot of us are new to this stuff and we should be open to new things. There are some great effects that the people in the class can use to give their photos an interesting perspective and effect.

September 8th Article Blog

http://shuttersalt.com/blog/10-examples-incredible-starry-night-sky-photography-and-how-video

The article that I decided to do this week was on night photography. I guess to some people this may be pretty sweet and to others, it might now be a big deal. But with me, I am completely astounded by night photography. It's just something about the night sky and being able to see the milky way and all the stars are what really get me going. It makes it even better when you have a beautiful landscape to go with it.
There were also photos that were stacked and you could actually see the trails of the stars that went with them, which I thought was also pretty cool.


But in the article, there were quite a few pictures giving some great examples of night photography and an instructional video. Shooting stars is something that would be quite a challenge. You have to pick out the location that you want to do and that meets your preferences. You can't have to much light pollution from surrounding cities. Then you have to wait until the moment when you think that its right and begin doing test shots of what you want and how you want it until you get to the moment where you're ready for that final shot. Doing stars and star trail photography would be something that I would love to get out and do.


The images used in this blog were from the website that is listed above.

Thursday, September 1, 2011

Elements to great photos?

So, the photos that you see that are by professional photographers or even amatuer. Pretty much anyone using a camera that has settings that can be altered. Anyways, those photos are not just taken. There are elements that have to be taken into account when capturing the photo or moment.

One of first things I learned about is the exposure. Exposure is the amount of light that is hitting the sensor when you are taking your photos. You get too much and the photo becomes overexposed and really bright. Too little results in underexposure and the photos looking quite dark. You have to go between the aperture, shutter speed and ISO to get the right lighting for the photo. Even when taking all that into account, there is what you could be photographing. You have to take in account the subject such as white things and black things. Depending on the exposure, they come out gray and you have to adjust to get their color without jeopardizing the rest of the photo.

Next, was the topic on lighting. Their are a few things to know about lighting. It could be natural or supplied through you via a flash. For natural light, there can be back light, where the sun is behind you, sidelight, where the light is to the side of the subject being photographed, or back light, where the light is behind the subject. Each one results in different photos and used under situations. Where backlight is good for photographing subjects, sidelight is good for landscape. Depending on the lighting, it can change the colors and details of your photographs, so you have to be able to get it right depending on the subject.

Then there is depth of field, which is focus on the object. When you have a great depth of field, you are focusing close in on a subject and getting its every detail. With little depth of field, you are focusing on the whole picture or a bigger spot. Using depth of field depends on what you're photographing. Great depth is great when focusing on animals and you're trying to blur the background around them. The picture is about them. With little depth, you should try and go for landscape. You want to have focus on everything; things up close and far out.

The last thing, was motion effects. Which is basically the use of the shutter speed. The shutter speed is how long the camera is exposed to something which can be a few seconds, to thousands of a second. Having a higher shutter speed would be ideal for trying to capture a photo where the subject looks like its stopped. Its not blurry, but just stopped. Lower shutter speeds can be used when trying to capture the motion of things. If you want to make it look like the object is still moving with blur or even running water. Having a low shutter speed can make for awesome effects in photos.

Wednesday, August 31, 2011

Location Location

So in going through my first photography class, we recently read a chapter regarding locations and months within the year that would be good for taking great pictures. There were 12 different locations and each one was assigned to a different month. Well, the professor wanted us to pick one of the locations and blog about it. Also, do a little research about it and why we picked that specific location.

The location that I picked was Mount Rainer National Park. The park is located in Washing and is home to an active volcano. Also, during the August season, there are flowers galore that are blooming all over the place. I picked this location because one of the topics in photography that interests me is landscape. I love the scenery that comes with the landscape photos that are taking. I find it, that if looking at the right picture, as cliche as it sounds, can be quite breathtaking. Seeing great landscape photos makes me want to be able to take photos like that. What I liked about Mount Rainer, is the active volcano with it and it sometimes being snowcapped. Even though its only one mountain, I like mountains a lot. Then the flowers that are blooming around it can really add to the photo.

August seems like the best time to go because there is so much going on at the time. The tourists that go to the park are starting to dwindle down. There is also a little snow on the volcano that makes for great shots. There are tons of flowers in so many different colors and the trees are just starting to change because of fall add to it. In the shots, you can get a snowcapped mountain with fall colors and flowers giving it a sign of spring. It can make for quite some beautiful shots.